
Organizing Art and Craft Supplies
/Over the last few weeks, we’ve been relying pretty heavily on indoor entertainment. The kids have been getting into the art supplies for some fun out of the sun. All those art and craft materials can get out of hand pretty quickly. It doesn’t matter if your supplies are for kids or the kid at heart, with so many little items to keep track of, it can be a real hassle to get it all organized. Fall is probably my favorite times to get crafty making DIY seasonal decor—and it’s going to be here before we know it. If you’ve got kids in the house, school supply lists are out and it’s time to prepare for another school year of assignments and projects. Whatever your artistic plans, now is a great time to take inventory of your craft supplies and get everything in order.
Gather the Supplies
If your art and craft supplies are scattered in multiple places throughout your home, just trying to get started on a project is going to be a headache. You’ll be running to get the paper from the office, the markers from your kid’s room, the glue from the junk drawer—you get the idea.
Collect all the art and craft materials from around the house. Our goal is to get everything organized in one space. When the time comes to get crafty, you shouldn’t have to run around in search of the supplies. Craft projects have a way of trying our patience even under good circumstances—don’t start off on the wrong foot with disorganized and hard to find materials.

Plan the Storage Space
You’ve gathered the supplies and now you have to make them all fit together in one space. Let’s determine what that means for you…
Where are you most often crafting… The kitchen table? Your home office? Have a craft room? Ideally, where do you want the mess of an art project? Find a location to store your supplies that’s close to where you’ll be using the materials.
It took some trial and error for me to find the right space to fit all of our art and craft supplies while still keeping the items accessible. Before settling on a cabinet system in the playroom, we had some items in the second floor office and some in the basement playroom. My kids had me running all over the house just to collect all the materials for a single project—leaving me feeling like an underpaid assistant to a couple of starving artists.
It could be a closet, cabinet, bookcase, even an old chest of drawers. Create a designated space for all your crafting supplies near your preferred workspace. That way, you’ll know right where to go when creativity sparks.

Sort + Organize
It’s time to sort out your supplies. Categorize your materials and put like items together. I remove most items from their original packaging to save space and create a cleaner look.
Your space will likely determine the storage methods you choose, but here are some tips for getting everything in order…
Shallow storage drawers work well for storing paper, sticker sheets and decals, stencils, glue, craft paint, paint brushes, and so much more.
Upright magazines holders and paper trays are also great for storing paper—making it easy to grab what you need without disrupting an entire stack. They keep small amounts of fabric and felt visible and accessible. They even work well for keeping coloring books, activity books, and crafting magazines neatly organized.
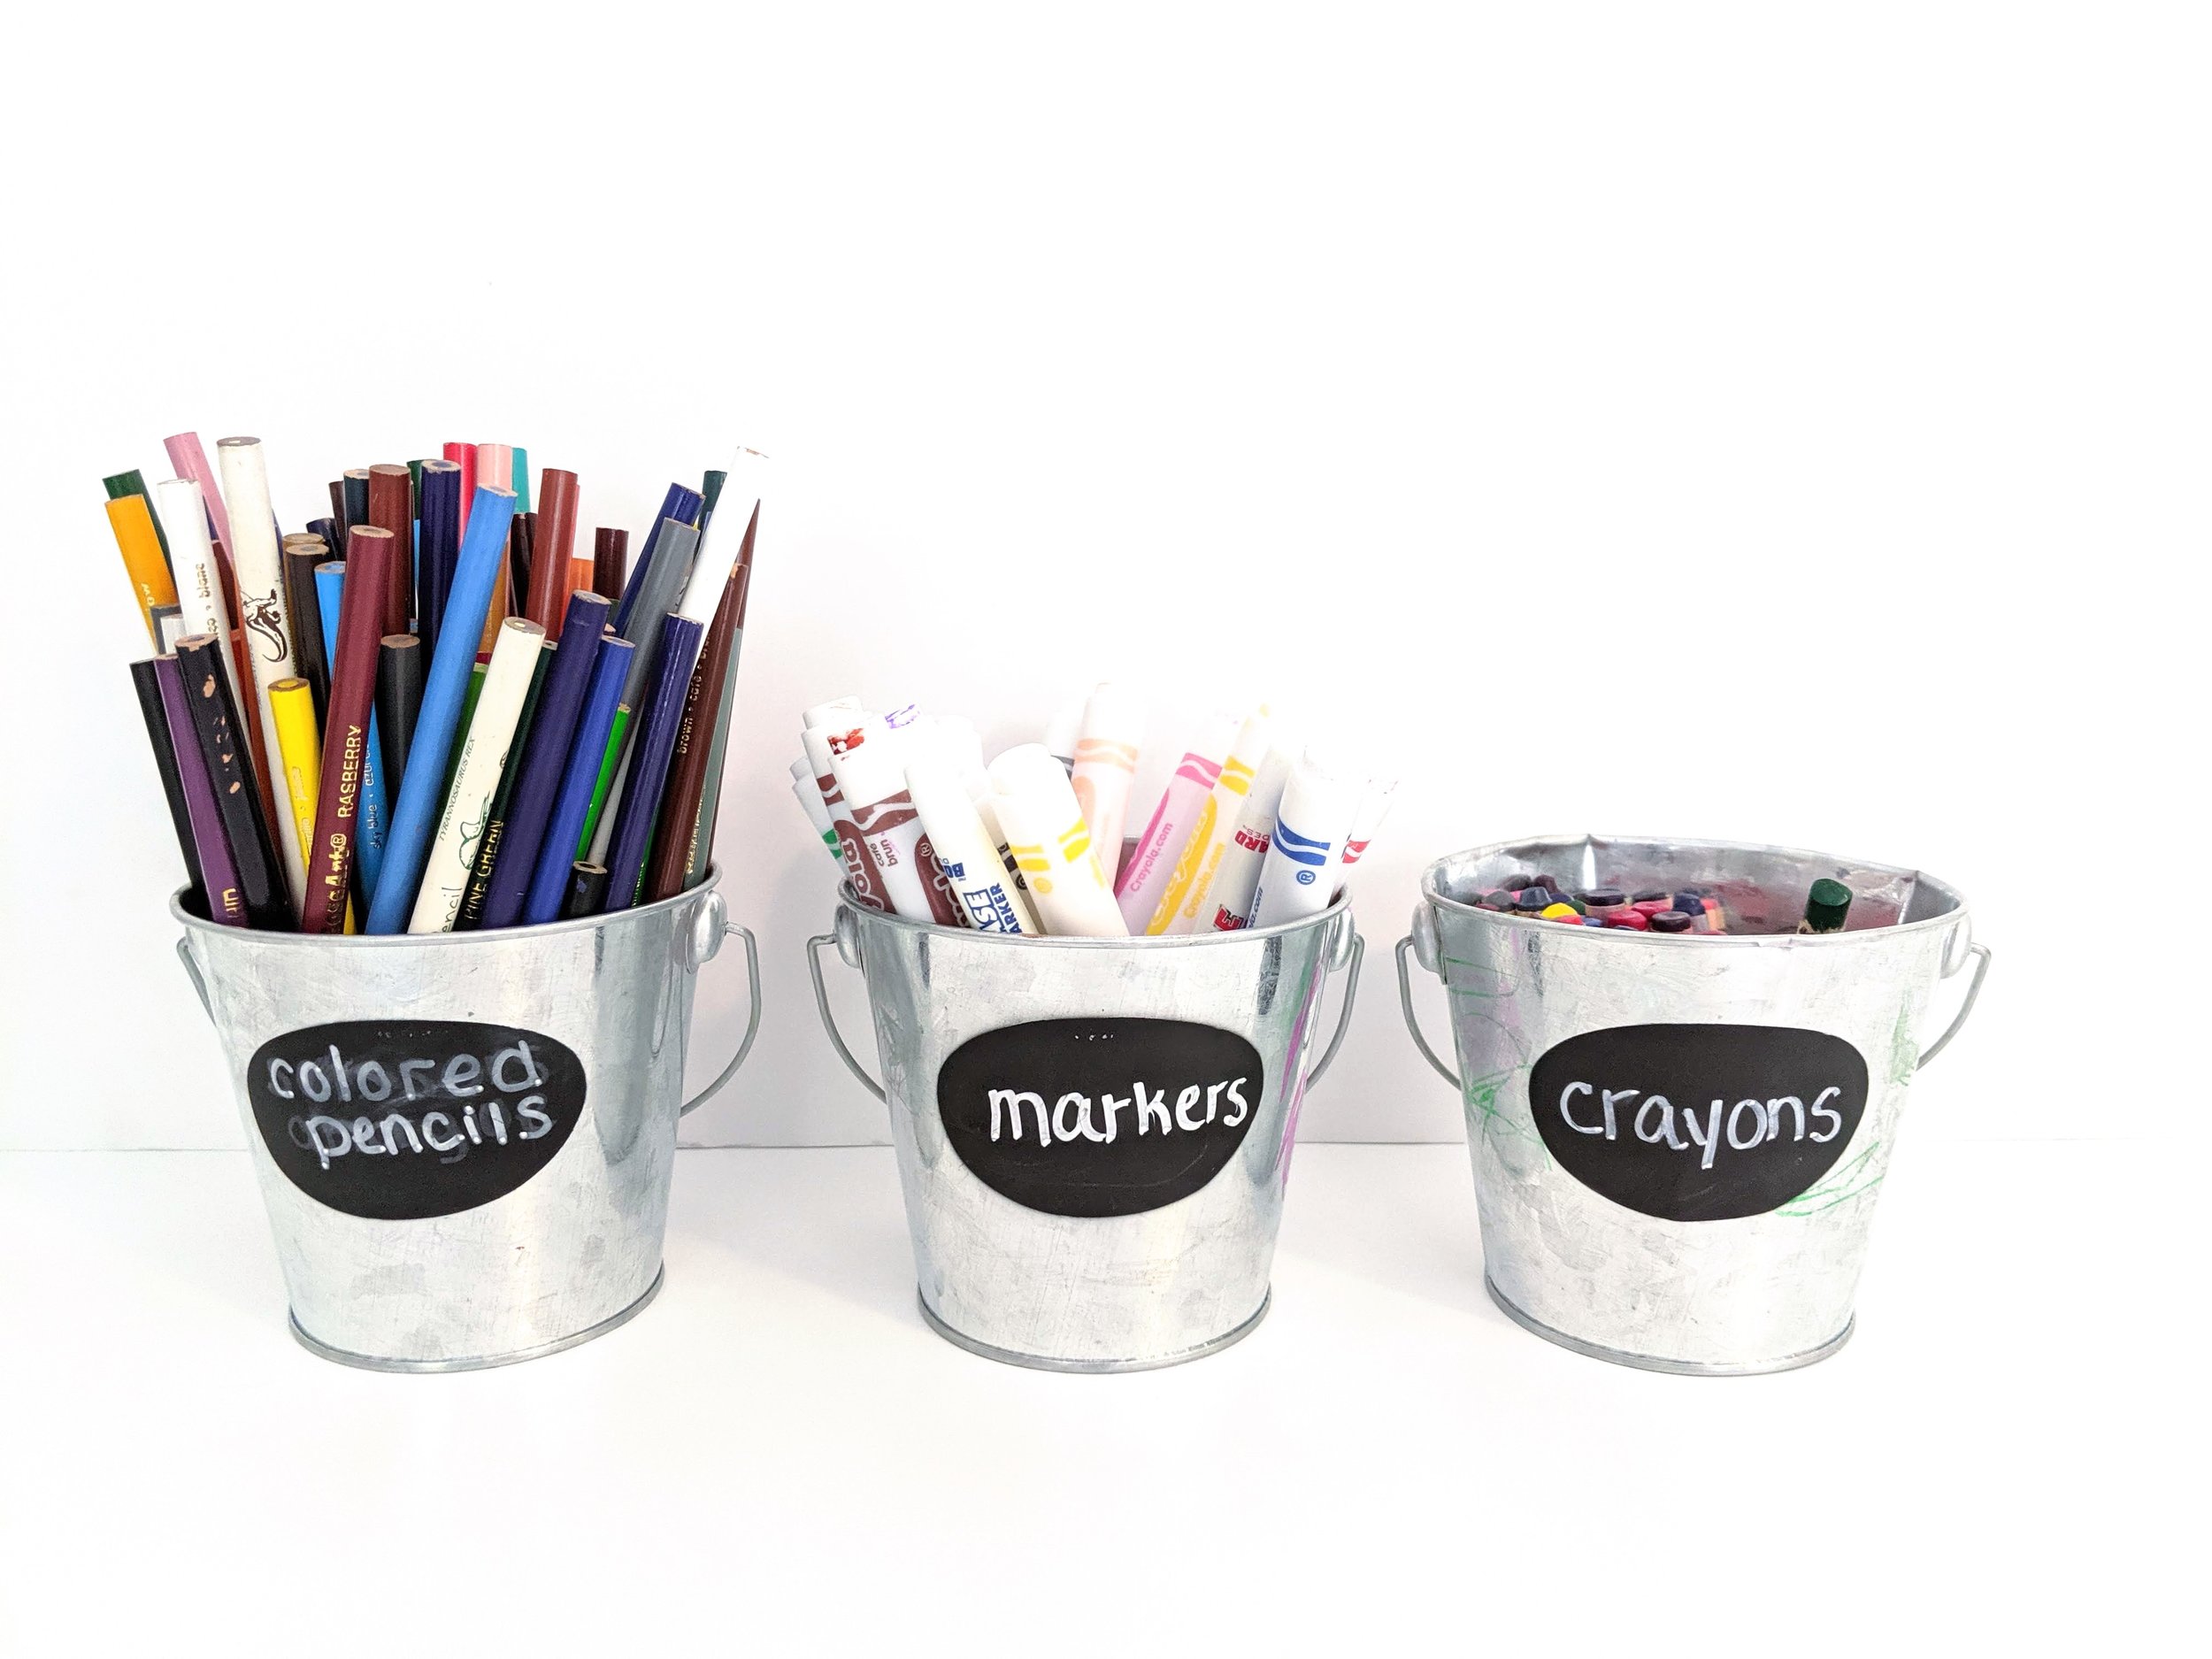
Jars or small bins are best for items like beads, pom-pom balls, writing and drawing utensils, and scissors.
Assess the materials that need contained and choose the storage method that best fits your designated space.

Label
I recommend using clear organizing materials for visibility, but regardless—label everything. I prefer to use chalk markers, but you can label using any method you like—marker, vinyl letters, label maker, or good ole paper and tape. Just be clear about the contents of each container so things are easily located. Having everything labeled and in its place means you’ll have less questions about where things are, you’ll spend less time collecting materials for others’ projects, and items are much more likely to end up in their rightful place when the project is complete.
Storing Finished Projects
All your art and craft supplies are in order and the kids are creating masterpieces at a rapid rate. Where do they all go?
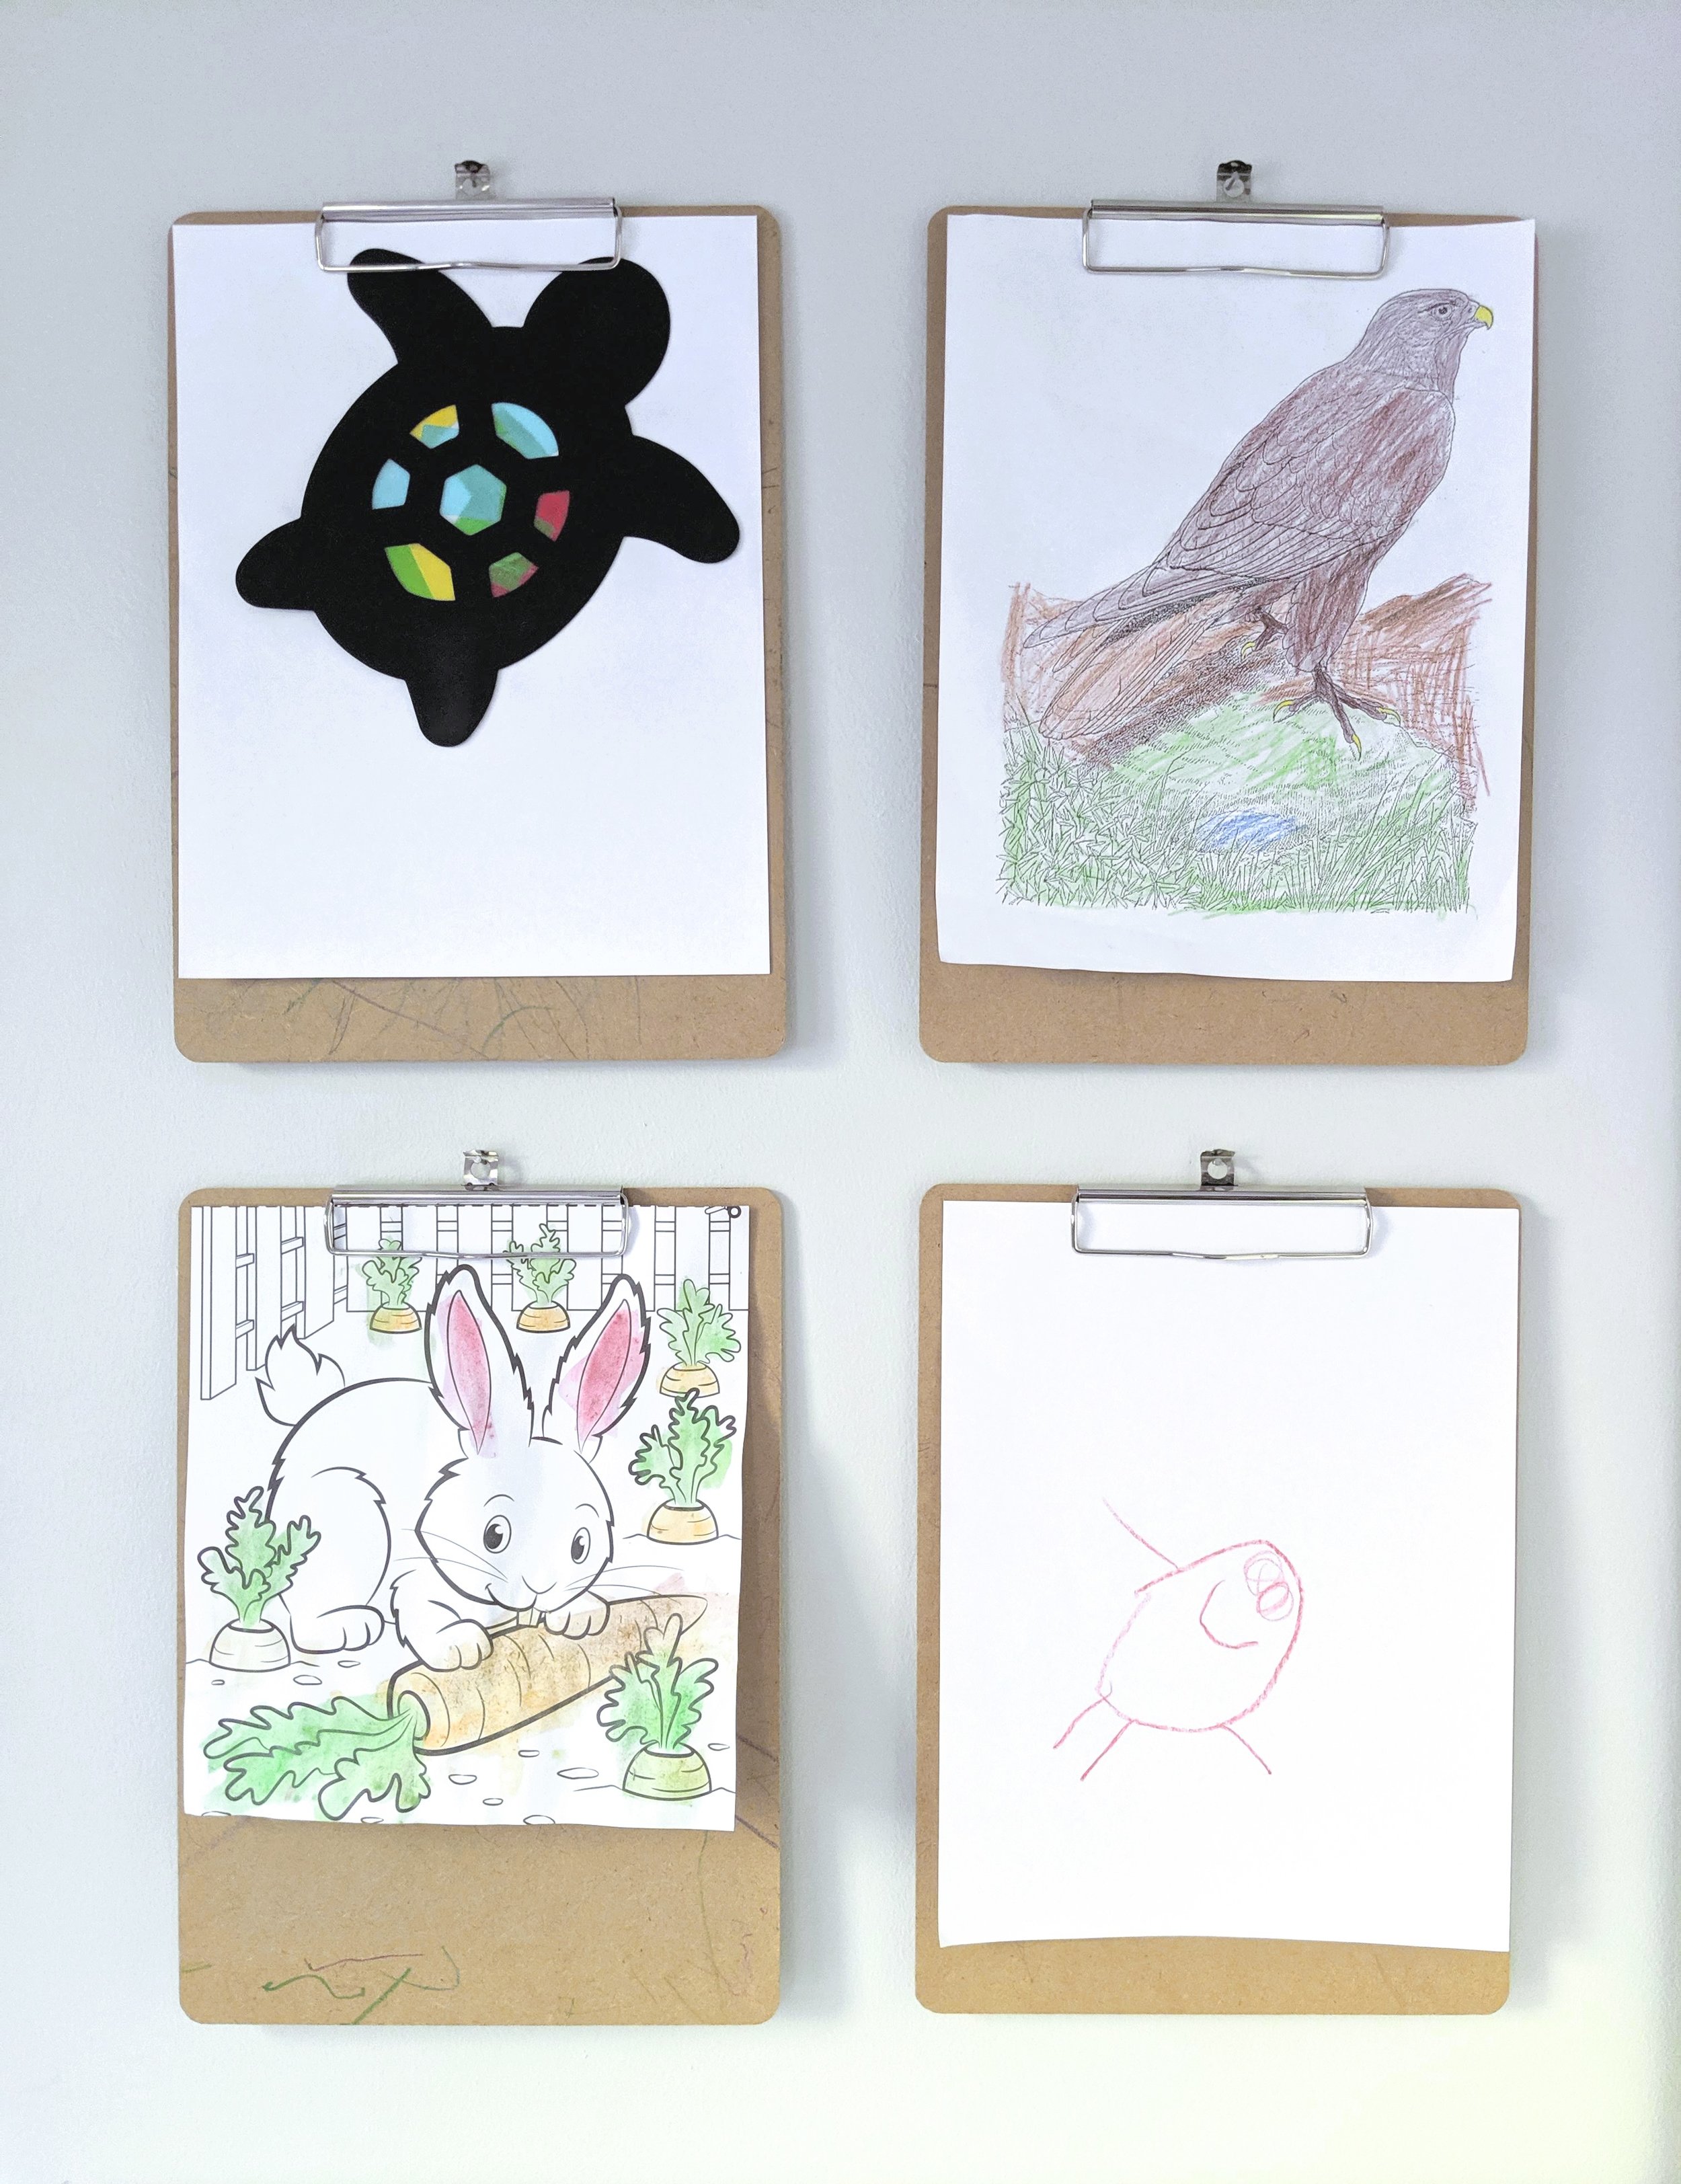
You could get picture frames designed specifically for displaying and easily changing out artwork. Personally, I have clipboards hanging in the playroom for displaying the kid’s masterpieces. After a couple weeks, I decide if I’m going to keep the pieces or toss them. Displaying the items for a while gives them their time to shine, allowing me to feel less guilt about throwing them out. Plus, if it’s hung in the playroom for a couple weeks, I find I remember that artwork long after it’s gone.
If I keep the artwork, it is stored in a small two-drawer (one drawer for each kid) filing cabinet in our office, just underneath the kids’ schoolwork binders. If you don’t have a spare filing cabinet, storage containers would work just the same. I also love the idea of taking photos of artwork and creating a photo book for each child. Choose a method that’s a good fit for your family and home.
